Friday, November 27, 2009

Little helpers...

First, hope everyone had a great Thanksgiving! It was a delightful one here.

We are now one day away from our due date.. and... in preparation today.. yeah, I took pictures of pottery for etsy.. lol.

(Ok, so I'm not officially packed for the hospital, but other than that, we're ready. Jack got the crib finished and set up last week..car seat in the car... we're just waiting on the baby now. :) )
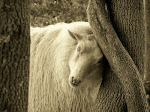
I turned little Virgil and Howie out in the yard today to munch up some fresh grass while it's still green.And then they came to help. You can't tell that these little guys are spoiled, can you? They're looking for treats. Surely, there's treats in there somewhere!

Wednesday, November 25, 2009

Christmas Ornament Ideas...

I was going thru my ornaments the other day and wanted to share some ideas. I haven't painted ornaments in a couple of years, but started painting them over 15 years ago...goodness.. maybe close to 20 now that i think of it. If anyone is interested in trying their hand at handpainted ornaments, I'll pass along a few tips that i've picked up over the years.


The satin ornaments work the best. (shiny ornaments - like the one here, sometimes want to 'blister and peel if you touch the sides with a damp finger!.. also, if the paint has too much water in it, the background can blister too as you're putting on your first coats)

Paint- I used a variety of water based craft acrylic paints - like 'folk art' or 'apple barrel' paints. Some of the paints will be runny, some too thick.. unfortunately, this is all trial and error because every bottle of paint seems to be different! The thick paints can always be thinned down a little by dipping the brush in water, but the real thin paints are hard to work with because they require so many coats to get a solid color.


For "scenery" type ornaments with a solid background, Iwould start off with 3 coats of a solid color of paint to give a good base - allowing it to dry completely between coats. Then, it's ready for color and details .


You can seal the painting with a water based varnish to protect the painting.. 'folk art' and 'apple barrel' sell small bottles of water based varnish - i prefer the satin, but looks like this one was a glossy.


This was an earlier ornament - and an example of the ornament color bleeding thru. If I remember right, this had only one coat of a base paint before I started to paint background and details.


Kids coloring books and Christmas books are a great place to get ideas.


Snowmen are probably the easiest. For the smallest details - like on the face, I use an acid free felt pen. You might want to test your pen first, some will bleed when you apply the sealer. I use "Zig" brand - it's waterproof and works great. (found in the scrapbooking section) Snowmen are great for personalized ornaments too.

Back from my flight attendant days.. (back when I was away from home 3 weeks surrounding a holiday.. it's nice to be home)

Another idea similiar to this one, to personalize for a sports player (neices, nephews :) ) is to use their school colors with their number on the jersey.. soccer ball, goal net, etc... Oh, the possibilities are endless!

So.. .all that being said, with about 10 dollars in supplies, you can get started with a box of ornaments, a few paints and an inexpensive set of brushes. (I didn't use 'good artist' brushes here, just picked up a pack of cheap brushes.. just look for ones that look soft and don't have bristles going every which way) Even if you don't think you can do it, you'd be surprised - especially with the snowmen - if you can draw 3 lumps of snow, you can paint it!

And I had to add this little ornament here in closing.. this was either the first year or second year of experimenting with ornaments - long before we had sheep! I don't know if I'll get around to painting any ornaments this year, but chances are if I do, they'll have sheep on them for sure this year! lol.

Saturday, November 21, 2009

A few naked ladies...

No doubt, if this post comes up as a result of an on-line search for 'naked ladies' the viewer will be somewhat disappointed.


I had been asked what Lambie looks like without her wool, so here she is. She thought this angle made her look a little pudgy,


so we tried for a better angle--


Much better Lambie. I noticed she wasn't as quick to pose without her wool.. and her stance was much different. I'm thinking she's still a little self conscious about the new look. ?


And this is Carlie.. a drastic change from "the mushroom sheep" !


and pretty Josie. I tried to get more pics, but these were the only ones that weren't being harassed by the ram yesterday.. the others were on the run. Not exactly a day to write on the calendar yet, but maybe in a few days we'll have lambing dates to look forward to.


Recycling again..

In an effort to get the wool off the kitchen table, kitchen chairs, ... (we've all been there, right?)

This simple drying rack was made from salvaged closet racks that were removed from a closet during a remodel. The lumber was remnants of 1" lumber that was ripped down, and in the fire pile. Well.. I actually took them out of the fire pile a week or so ago in hopes to find a purpose for them. I had originally thought of using 2x4 lumber to make a drying rack, but these worked perfect! (and 2x4s would have made this too heavy to move around as easy) The rack seems to work well for it's purpose, I only wish I had not nailed the side pieces - I think it could have easily folded up and fit under the bed when not in use. (but when it comes down to it, when will it not be in use?) I am thinking that when it is not being used for wool, it would be a great for drying pottery on -which is why i saved the wire shelves to begin with.
The basket is a fun find from a fridge/freezer that had been thrown away. (actually the old freezer had 2 of them in it) Anyways, it matches.. and even if it didn't.. it's getting re-purposed!
Total cost of the project? You guessed it.. plus, it's great to use up that 'fire pile' lumber!

Friday, November 20, 2009

Thick morning


It was a beautiful thick morning out this morning, but I'm sure it was not fun (or safe) to drive in!
In case i don't make it back on here soon, hope everyone has a great Thanksgiving!

Saturday, November 14, 2009

Felted Wool Diaper Covers - Take 1


Warning, this could turn into a "Flat Creek Wool and Potty" site!

I have been reading up on the advantages of using wool - (when you have bags of wool everywhere, it's a good subject to read up on!) And most recently, reading on the advantages of using wool diaper covers. (Thanks Crystail for the reminder on this) So, after a little reading and research, I'm attempting to make some wool covers. This was the project of the morning, and I will finish it up in the next day or so. I will update on how they work when the little guy gets here to try them out!


I made a pattern from a cloth diaper that i had here. I enlarged the pattern quite a bit, since i'm not familiar with wet felting and how much the wool will shrink. (i made the pattern on the slick side of wax paper, and then covered with saran wrap)


Using some Lincoln Longwool Roving that I had here on hand, I started layering over the pattern- first one direction, then the next layer, another direction. I used a total of 4 layers. (it took between 1 and 2 ounces of wool)

Once the 4 layers were down, I took hot soapy water and poured over the wool and massaged the wool, flipping it over as it began to felt, and continued to work the wool. Once I could pick it up, I wrung it out and ran it under hot water - then cold water, to get a tighter felt. I finally wrung it out and threw it in the dryer for a few minutes. It came out a strong felt and slightly bigger than the oversized pattern that i had made.


I made another pattern (the exact size of the cover) and cut out the felt to the proper size.


Now how cute is that? I still need to do something with the edges and gather the little legs and back. It will need buttons or velcro. I'm thinking of putting snaps in it to attach the cloth diaper to -to hold it in place. And then.. maybe a little felted lamb on the bottom! (but nothing 'too cutesy' lol)

A few things I never new about wool covers - Wool will wick moisture away - and even though it is not 100% waterproof, because of the wicking, it will help to keep the baby dry. Also, they do not need to be laundered every use - the wool has neutralizing properties. They should be treated with lanolin. ( i have more to read on that!)

Thursday, November 12, 2009

Wool Drying

In anticipation of getting a drum carder soon, I have been washing a lot of wool!

This particular little bundle of wool is from "lambie" who was hand shorn with the old fashioned blades last month. (as I sat on the ground or on a bucket next to her.. next April.. shearing school!)

I enjoy hand shearing, and it seems that the sheep sort of enjoy the special attention as well, but hopefully next year i'll be able to set them on their rumps and shear a little faster! Considering it took 2 days to shear all of Lambie, it wouldn't be hard to break that record! (there is still a ewe running around out there 2/3's sheared.. )

Wednesday, November 11, 2009

So tell me again..

why can't the sheep get to the new barn?

This was the project that Jack worked on last year.. building a new barn. For those who know Jack, he likes to build stuff! So, this is Jacks barn. Mine is the old crooked one by the road that is full of junk! (and a pottery room!) (by the way, I like the old crooked barn!) Jack mentioned replacing the old barn with a new one, so this is a compromise - a new one down over the hill!

Or.. as it appears from this angle, 'up' the hill!

Part of Jacks selling point was "we'll put the sheep in this part" ... well, who wouldn't go for that?

Only, a lot of fencing had to be done first - which leads to his fencing project this year.
He had an excavator come and clear out a path thru the woods where he could run a fence, and open up a new pasture - partially wooded, the sheep will love that! And best of all, they will have access to the new barn this winter! (well.. not so fast)


The fence was ready - coincidentally, just in time for our cows! So, for convenience, we put them in the new barn and the new pasture - which is separated by the sheep lot with just a temporary fence.


And oh yes, here it is.. the reason the sheep will stay on the pasture that they are on for a while longer... burrs!

(fortunately, the burrs come off the cows rather easily - much nicer than they could come out of wool!)

So the cows can keep the new barn and the burrs (for now) the sheep will be just fine on this side of the fence. However, looks like a big spring project is waiting! (fyi - I hear that a vinegar and salt water solution works wonders on killing burrs and weeds!)

Monday, November 9, 2009

The Wool House- Open House

Just as I suspected, I want a Wool House! And who wouldn't! Is this not adorable? (my photo could be better, but as far as the wool house, I don't think there's anything that could have made it any nicer!)


The Open House event at Punkins Patch was great! The weather was beautiful (and windy) but for November, it just couldn't have been any nicer. It was a great day for sitting on the front porch- spinning, knitting or sampling the cookies.

For a view inside the wool house, (and a few of the goodies that were in there) check out the Punkin's Patch blog - http://myfavoritesheep.blogspot.com/2009/11/house-cleaningor-scratching.html I was hoping to get more pictures, but the day went by like a whirlwind. (literally)

Thanks to everyone who stopped by and said hi at the pottery booth! It was so nice to meet each of you.

And Thanks Sara for the invite to be a part of your event, you throw a great Open House!

Saturday, October 31, 2009

Pots everywhere..

Thank you to the crazy sheep lady for the invite to set up at your "Wool Open House" next week! http://myfavoritesheep.blogspot.com/2009/10/youre-invited.html I'm looking forward to the day, meeting your characters, and your friends. Also, I can't wait to see the wool house! (we are all going to want one!!)

In preparation for setting up next week, I have been throwing pots and pulling handles like crazy :) (well, like crazy considering Jack had the flu this past week and my belly is getting really big!)

I would suspect this will be the last batch of throwing and firing that we'll have here for a while - our baby is due in November. Meanwhile, in the coming week, these pots will be fired, glazed and fired again. All of the pots here are either Ewenice pots, or yarn bowls. New to this group, is Ewenice pitchers, serving bowls, a plate and ornaments.


These pots are drying in the throwing room downstairs:
(another beautiful sunny day like yesterday would be ideal right now!)


These are in the kiln room just finishing up with the drying stage:


And these are dry and packed in the kiln already:


If all of the pots aren't dry and ready to bisque fire tomorrow evening, I will repack them in my other kiln (which is a little smaller) and fire the pots that are ready so that I can get on to glazing. The other pots should finish drying out nicely with the heat from the kiln and be ready to fire when the first batch is complete....they'll be glazed, and finished just in time to be boxed up Friday night! Then the following week.. we'll start getting ready for the baby ;)

Any other last minute people out there?

Thursday, October 29, 2009

Recycling..

Actually, I think i might have a disorder here.. compulsive recycling. (but i won't go into all that)

I found another use today for the cardboard box.. between it's original purpose of shipping, and the recycling purpose here of "fire starter" the box has an added purpose now of being a disposable pottery 'throwing bat.

(for the non-potter, the bat sits on the pottery wheel head and once your pot is made, you lift the bat off the wheel head and set it aside for drying - put down another bat and you're ready to make another pot! - the other option is to throw directly on the wheel head and lift the wet pot off the wheel head, taking a chance on distorting the pot)

I have bats that i've purchased (anywhere from 13.00 to 28.00 a piece) and others that have been made out of scrap plywood, and masonite pieces.. but my collection of bats is limited to 7. So, after 7 pots are made, that's all the pots that i can throw until those 7 pots start to dry enough to remove from the bat.

All that being said - today I really needed to make more than 7 pots at a time. The cardboard was a great temporary, easy solution! In just a minute a bat can be cut out of cardboard with a utility knife and ready to use. I don't know how well they would work if using large amounts of clay, but i was throwing 1 to 2 pounds at a time and they held up quite well.

So well, i might just use them again before putting them back in the 'fire starter pile!

(after they dry out that is)


Wednesday, October 28, 2009

And on the 9th day of Christmas..


In the evenings, I try to have some kind of little 'something' to do.. (yeah, during csi.. i can listen to those shows, but i don't care to actually "watch") So, I worked on some Christmas ornaments last night. Thinking of just glazing them white and looking for some little 'sheep bells and wool ribbon :) We'll see. I made some little ewenice buttons too (up at the top) but not sure how those will go.. they are quite the little time consumers!


Now, is it just me, or does it seem like fall is going really fast? Seems like i heard the time changes this weekend.. i sure hate to lose 'that hour of daylight in the evening!

Monday, October 26, 2009

Beautiful fall day...

It was a fantastic day outdoors today!
The rain seemed to come at a time here when the leaves were just changing - knocking a lot of the leaves to the ground before they could be fully appreciated! (so we'll just appreciate them on the ground)
.
.


Took a few minutes to take a few pictures of the last group of pots that came out of the kiln a few days ago. I have been working on making more Ewenice bowls and mugs .. the weather has been just perfect for making pots. Not that the weather has to be nice, but it has been an advantage to throw a pot and set it outside for a short time in the shade to slightly speed up the drying time so that the pots can be trimmed the same day they're thrown.

I haven't seen the forecast, but hope this weather sticks around for a while!

Friday, October 23, 2009

Soon to be 'November Iris..

Pretty soon, we'll have to rename our October Iris to November iris. It has been thru a couple of frosts this week and is still shooting out new buds...
I'm still puzzled at how an iris knows to bloom this time of year? Have there always been a group of Iris that would bloom out in the fall, or is it global warming ? :)

little Virgil


Wednesday, October 21, 2009

Cows like to have their picture taken too..


.


Our Faith.. she seems to like to have her picture taken - the other one, Grace - she'd rather be eating.


We just turned the girls out in the new pasture a few days ago. They were very happy to get out of the barn! They had been cooped up for little over a week and even though the grain was good, they needed sunshine and grass :) Faith was so excited to be outside again that she ran right through the temporary fence separating them from the sheep pasture. (exactly why we kept them penned for a week! If they had got out when we first got them, we would have never been able to catch them.. it would have been like that dog on the movie "funny farm" and I'd be posting "sightings" of them running thru the town and small villages along the way) But all is well and they are settled in now.


(vintage family pic of Grandpa checking on his cows..or them checking on him)

Monday, October 19, 2009

A little frost

We had our first frost yesterday morning. Apparantly in celebration of the summer ending, the boys slept outside that night, and were silvered by the frost until the sun quickly melted it all!


It didn't seem to effect the iris that's blooming though - it's still full of blooms!